How I built it: watch the video or read below
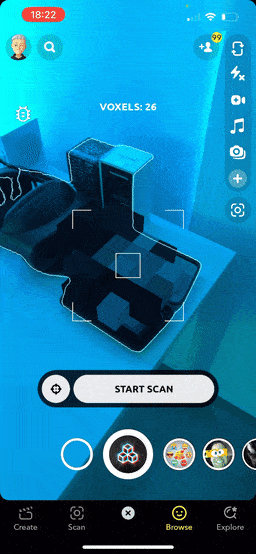
Scanning
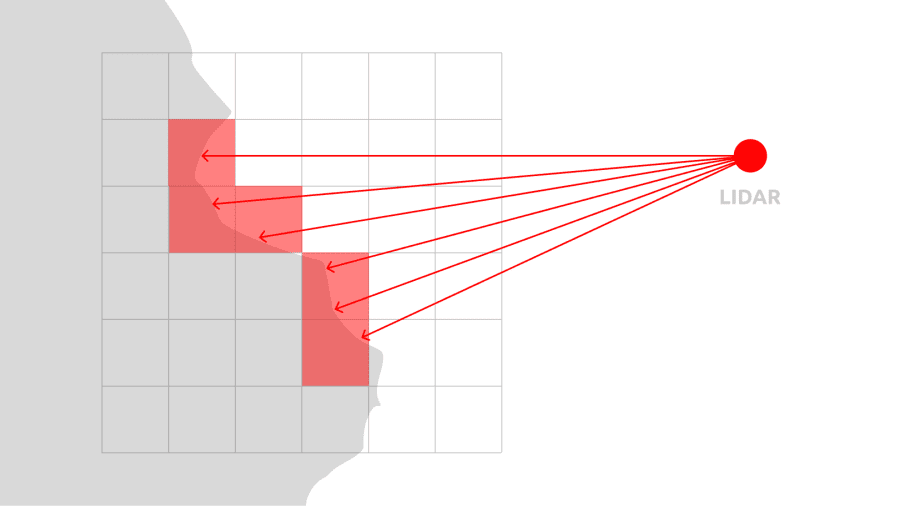
The lens uses LiDAR. It constantly performs raycasts to the World Mesh and aligns results according to the spatial grid. If there is no voxel at a certain point, new voxel spawns. This algorithm had an interesting evolution!
- Initially, every voxel was a separate cube with a separate material. The device camera texture was cloned in a low resolution, the voxel screen position was saved and material displayed only a part of the texture. Imagine how slow it was: a texture for every voxel! It became laggy after ~500 voxels.
- Then I figured out how to work with ProceduralTextureProvider and pick an actual color from the camera image. There still were 3D cubes, every cube had its own material. Checking if there is a material with a certain color didn’t help: even if I decrease the palette quality, there are still dozens of thousands of materials. However, it allowed making a scanner with up to 20 000 voxels before it started to lose performance.
- In the end, I started to use Mesh Builder. All the voxels are actually a single, massive mesh with colors saved as vertex attributes. It also has only one material. With some additional optimization hacks, such as real-time removing overlapping faces of side-by-side voxels, I finally was able to make the scanner work with up to 1 000 000 voxels. And it’s still fast!
Scanning UI
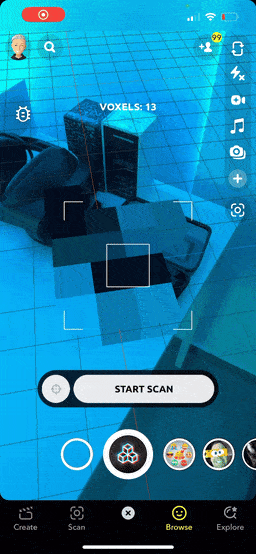
It’s super simple:
- Use two finger gestures to scale and rotate the voxel grid.
- Tap “Start Scan” to begin
- You can pause or stop scanning at any time.
ML highlight
To make scanning easier for users, there is a built-in machine-learning model that restricts the scanning area by custom object segmentation: it’s able to detect most objects such as people or furniture.
Preview
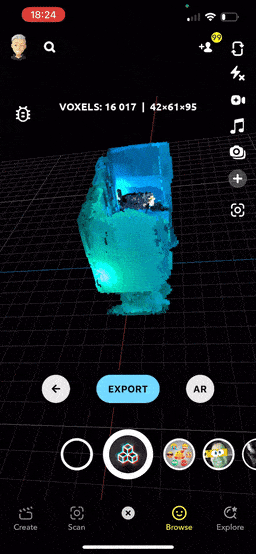
In the neat preview mode, you can easily rotate, scale, and pan across the scan. The lens calculates the average voxel weight and automatically centers the scan. The camera is also positioned to provide a comprehensive view of the entire object. Btw, have you noticed that cool, seamless transition from scan to view?
AR View

It’s an AR app, right? So you can place your scan in augmented reality, change its scale and even walk inside! And go back to the View mode any time you want.
Export
But we can’t export a 3D model from a Snapchat lens… Right?
Come on! What’s the point of making a 3D scanning lens without export? This is the funniest part of the article. Let’s go!
The algorithm
Yes, there is no way to generate a file inside a lens. Transferring data to an external server is also not possible. Moreover, when shared/multi-user features are used, capturing data from LiDAR or the camera image became unavailable due to privacy reasons.
So the only way to do it… Is to encode a 3D model into an image or video that the user can record and save!
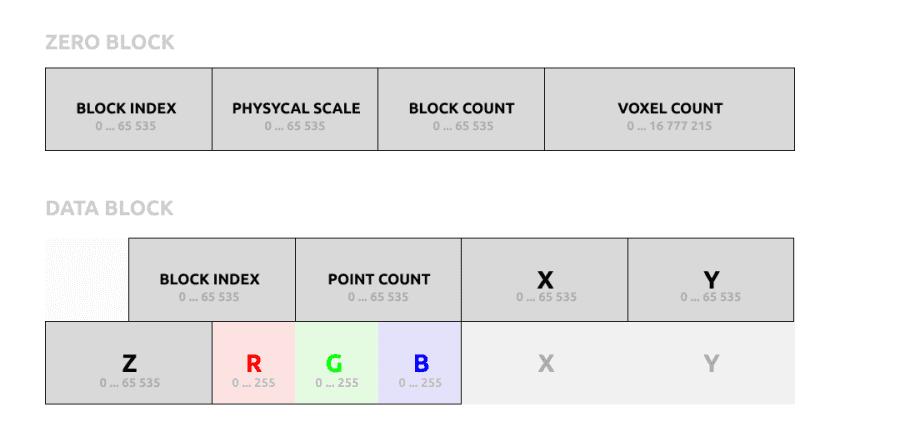
First, I designed a format: every voxel is encoded in 9 bytes: 3 bytes for color, and 6 bytes for voxel position. The position contains 3 coordinates: x, y, z. Two bytes per each allows to store a scan with dimensions up to 65 536×65 536×65 536. No negative numbers: after the scan is done, it’s normalized into these intervals.
Encoding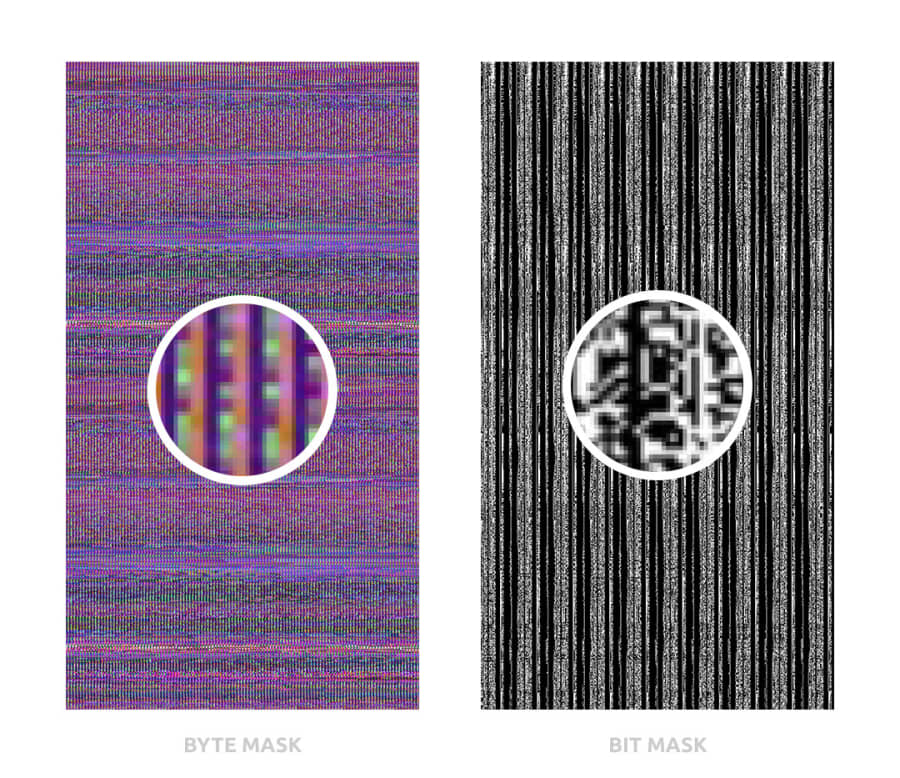
- Initially, I thought about using a byte mask. Every pixel is a color that consists of three bytes. Sounds cool: if the output image is 720×1280, I can encode more than 100 000 voxels… And it obviously can’t work because of video compression. I tried some error-correction methods, such as Reed-Solomon, but video compression messes up ALL the pixels, so this method is useless: it can fix only a certain amount of corrupted data.
- Then I decided to try a bit mask, where every pixel is black and white and encodes a single bit. It’s still dense: I can fit about 13 000 voxels in a 720×1280 image. Video compression destroys colors but is pretty accurate with the brightness (because human eyes are more sensitive to it). So even when pixels are messed up with their neighbors, black pixels never get brighter than 0.5, and white pixels never get darker than 0.5. That means I can easily reconstruct the original value… And it also didn’t work, because the Snapchat app messes up output resolution. Even if the render target is 720×1280, the output video resolution is 704×1280. It’s also different for photos. Moreover, it could also possibly vary across devices, and data encoded in pixels became irrecoverable.
- I almost gave up. I needed something that survives compression and resolution changes. And suddenly I found the solution! It’s… OCR! Optical Character Recognition.
A QR Code Stream
The easiest OCR for encoding & decoding is a QR code! This is how the video that the lens generates looks:
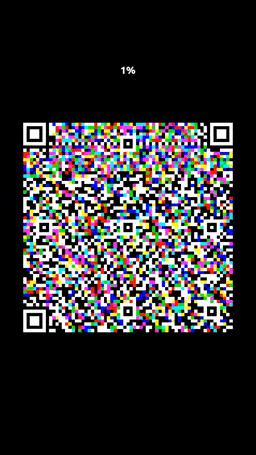
The video is slowed down: actual output displays 1 code per frame.
So I implemented a QR encoder in Lens Studio. The data is separated into a blocks array:
- Zero block contains metadata: physical scale, data block count, and total voxel count.
- Data block contains block index, voxel count, and up to 25 points in binary format, as described above: 9 bytes per voxel.
- After messing with some errors I figured out that it’s not possible to store pure binary data in QR code: so I had to encode everything in base45. It worked but increased output data size by 25%.
When the user taps export, the lens generates a series of RGB QR codes: it’s basically 3 codes, in red, green, and blue channels. This process is kinda slow and can take about a minute for 50 000 voxels.
Then the user can start recording a video and the lens shows QR codes frame-by-frame.
The bandwidth is ridiculously low, but it works! So, (25 points x 9 bytes + 4 meta bytes) x 3 codes per frame x 30 FPS gives us… Only 20 Kb/sec! Still faster than dial-up lines 20 years ago, haha!
Web Viewer and Exporter
So we have a video with an encoded scan. How to decode it?
I’ve made a web application that splits video into frames, recognizes a QR code on each frame, and then reconstructs a 3D model. All user needs is just to choose a video: the app does everything automatically, though the process can take some time.
The app respects privacy: processing happens in a browser, hence the scan is never uploaded anywhere.
After the scan is decoded, the user sees a viewer the same as in the lens: can rotate, scale, and pan across the scan.
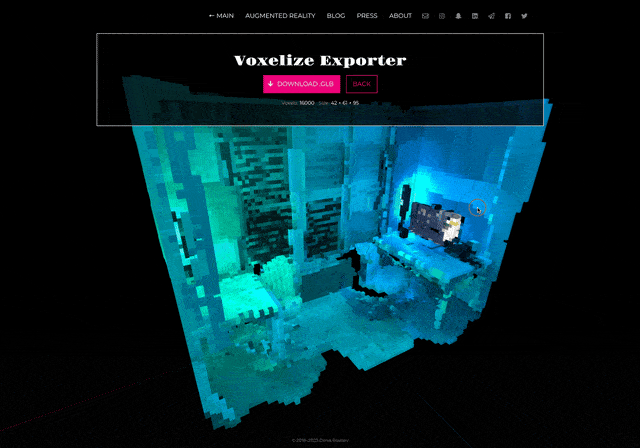
And yes! Get a scan as a regular 3D model in GLB format, that can be opened in Blender, Cinema 4D, or 3ds Max.
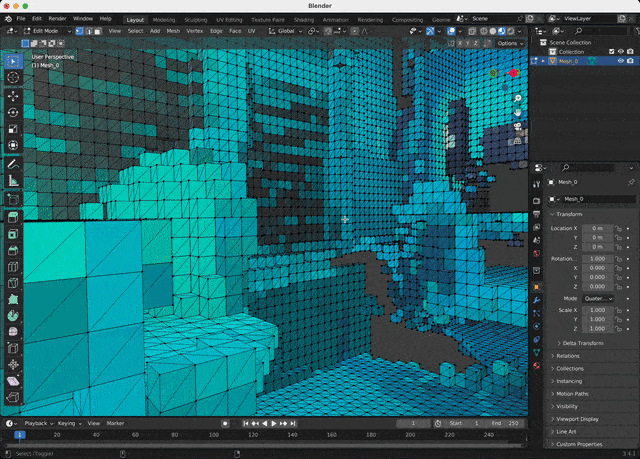
The last step is to import a downloaded model into any 3D software and set up a shader: the color data is stored as vertex attributes. A couple of mouse clicks in Blender!
Hopefully, one day we will have an API to generate any text/image/binary files right inside lenses, or the ability to send data to external servers. But for today such a method is the only way to retrieve data from a lens. At least, it works and it’s fun!
That was challenging!
I consider Voxeize as one of the most complex projects I’ve ever made in Lens Studio. And it’s not only the lens with a lot of scanning features but also an additional web app!
Making a web app was such a pain: it turned out that video processing varies between browsers, so I had to build several workarounds for Safari, Chrome, and mobile versions. For example, sometimes Chrome returns wrong dimensions and distorted proportions when I extract a single frame from a video stream, and mobile Safari has strict memory limitations. However, I’ve made it work everywhere.
So in this project, I:
- Implemented real-time voxel scanner with neat UI.
- Added SnapML object segmentation to make scanning easier.
- Figured out high-speed 3D mesh generation and on-the-fly optimization in Lens Studio.
- Developed QR code encoder to store 3D model data in a video, resistant to compression.
- Developed a separate web app where users can preview and export scans in GLB format.
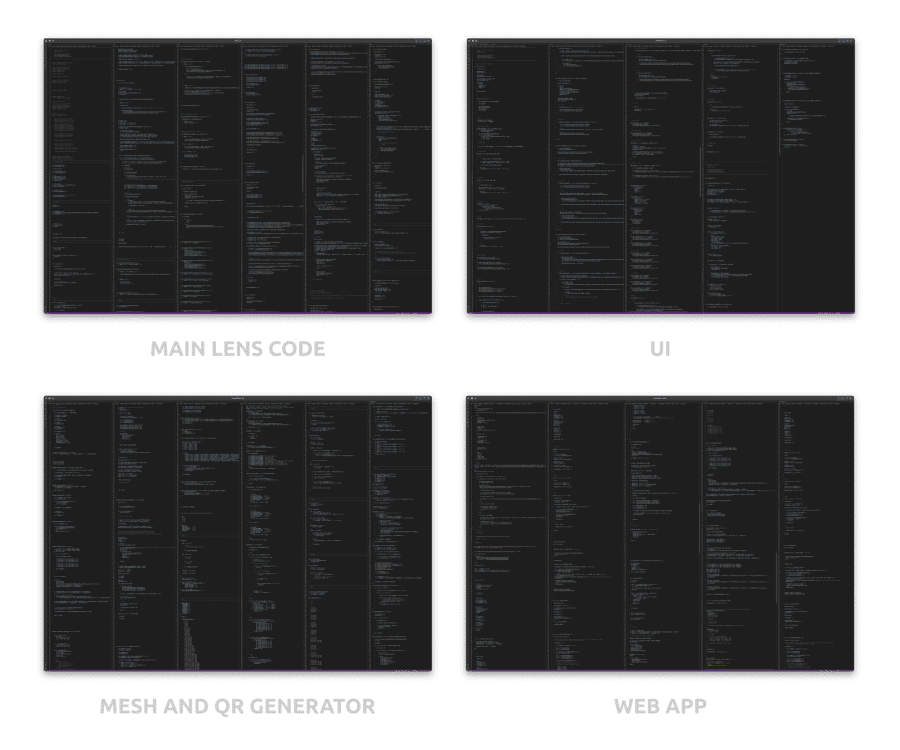
A lot of code:
What’s next
I’m planning to build an actual iOS app using Snap Camera Kit: it will open more possibilities, such as in-app scan storage and direct export.
As Lens Studio evolves, I gonna use this technology to build experiences where users can scan, edit and share cool voxel objects between different lenses and locations (it’s currently not technically possible in LS).